
Access Control Integration With a Visitor Management System: A 2026 Implementation Guide for Indian Offices
Key Takeaways
- Integration closes a measurable security gap, not a theoretical one. Upgrades a VMS from a passive logbook to an active system that automates entry, tracks movement, and enforces real-time zone restrictions.
- Planning Precedes Hardware: Define who gets access, where, and for how long before buying hardware. Skipping zone-mapping is the top cause of deployment failure.
- Auto-Expiry is Essential: Systems must automatically revoke credentials the exact moment a visit ends to prevent unauthorized access.
- QR Codes Accelerate Deployment: The most frictionless option for visitors. They eliminate physical cards, avoid biometric enrollment, and sync instantly with VMS passes.
- Safety Protocols Matter: Plan for power failures. Fire exits must be “fail-safe” (auto-unlock), while high-security zones must be “fail-secure” (remain locked).
- Phased Rollouts Reduce Risk: Launch zone-by-zone to troubleshoot, test edge cases, and train staff without disrupting daily operations.
- Data Compliance is Mandatory: Secure explicit consent for biometrics, strictly minimize stored data, and define clear retention policies for access logs.
A visitor management system (VMS) is very good at the front desk. It registers a guest, captures consent, prints or generates a pass, and pings the host on WhatsApp. Then the visitor walks past reception and, for most standalone systems, disappears. The software has no idea whether that person took the lift to the fourth floor, tried the server-room door, or is still standing in the lobby forty minutes after checking out.
That blind spot, the gap between “checked in at reception” and “actually walked through a controlled door”, is the single most important thing access control integration closes. It is also where most deployments quietly fail, because teams treat it as a hardware purchase when it is really a planning and protocol problem.
This guide is written for the person who actually has to make the decision: a facilities lead, an IT manager, or a security consultant specifying a system for an Indian office, a commercial tower, or a multi-site enterprise. It covers how the integration works at a technical level, the exact sequence to roll it out, the two safety decisions people most often get wrong, and what India’s Digital Personal Data Protection (DPDP) framework now requires of the movement data these systems generate.
Why Access Control Integration Matters
It helps to be precise about what “integration” actually buys you, because the marketing language around it is vague. A standalone VMS is, functionally, a very good digital logbook. It knows who said they were entering. An integrated system knows who did.
Once access control is integrated, the system can automatically:
- Grant time-bound entry to a pre-approved visitor
- Restrict entry to only the floors or zones a host has approved
- Revoke access automatically once a visit ends or expires
- Log every actual door-entry event, not just the front-desk check-in
VMS Alone vs. VMS with Access Control Integration
Capability | VMS Alone | VMS + Access Control Integration |
Visitor registration and consent capture | Yes | Yes |
Host notification | Yes | Yes |
Digital badge / QR pass | Yes | Yes |
Physical door or gate entry | Manual, via a guard | Automated at the reader |
Zone-based restriction | Not possible | Enforced automatically |
Auto-expiry of access | Not possible | Automatic, on checkout or timeout |
Audit trail of movement | Front desk only | Door-level, timestamped |
Accurate emergency muster list | Limited | Real-time headcount by zone |
That last row is the one security consultants care about most. In a fire, a lockdown, or an evacuation, a reliable, real-time account of everyone on the premises stops being an operational nicety and becomes a life-safety requirement. A front-desk log that says forty people signed in tells you nothing about who is still inside.
Who Actually Needs This (And Who Is Over-Buying)
Not every office needs biometric turnstiles on every floor, and a surprising number of deployments fail because someone specified far more control than the building’s risk profile justified. Match the depth of integration to the organisation, not to the sales deck.
Organisation type | What the integration usually needs to do |
Single-floor office or startup | Validate a QR pass at one main door; minimal hardware |
Multi-floor corporate hub | Restrict visitors to host-approved floors and zones |
Multi-tenant commercial tower | Enforce tenant-specific rules plus shared common-area control |
Healthcare or government facility | Tie identity verification to entry; strict compliance logging |
Manufacturing or warehouse | Contractor and vendor access windows; safety-zone restriction |
If you run a single-floor office and a vendor is quoting you a fingerprint reader on the server-room door plus facial recognition at the entrance, pause. A QR-to-door validation with a software rule that expires the pass at checkout may give you 90% of the security benefit at a fraction of the cost, and the compliance burden, which matters more than ever now that biometric data carries specific consent obligations under Indian law.
Core Components Involved in the Integration
Before the step-by-step, it is worth having a clear mental model of the moving parts, because most “integration failures” are really a mismatch between two of these four layers that nobody checked in advance.
Layer | What it does | Typical examples |
VMS software | Registers visitors, issues passes, manages approvals and consent | Cloud-based VMS platform |
Access control panel/controller | Applies access rules; talks to the hardware | Door controller, gate controller |
Physical hardware | Physically permits or denies entry | Turnstile, boom barrier, electronic lock |
Credential | What the person presents at the door | QR code, RFID card, face, PIN, mobile pass |
Every project is really about getting these four to speak the same language, in real time. The credential is issued by layer one, must be understood by layer two, which drives layer three, and is presented by the person as layer four. When any handoff is manual or delayed, you have a gap.
Step-by-Step Guide to Integrating Access Control with a VMS
Stage | Key activity | Typical owner |
1. Planning | Map access zones and visitor types | Security / Facilities |
2. Hardware selection | Choose panels, readers, and credential type | IT / Facilities |
3. Integration method | Confirm API, SDK, or protocol compatibility per model | IT + VMS vendor |
4. Credential setup | Configure QR, RFID, or biometric provisioning | VMS vendor |
5. Rule configuration | Set zone, time, and approval logic centrally | Security / IT |
6. Testing | Run structured tests, including edge and failure cases | IT + vendor |
7. Staff training | Train front desk and security on exceptions | HR / Security |
8. Phased go-live | Roll out zone by zone, low-risk first | Facilities / IT |
Step 1: Map Your Access Zones Before You Touch Any Hardware
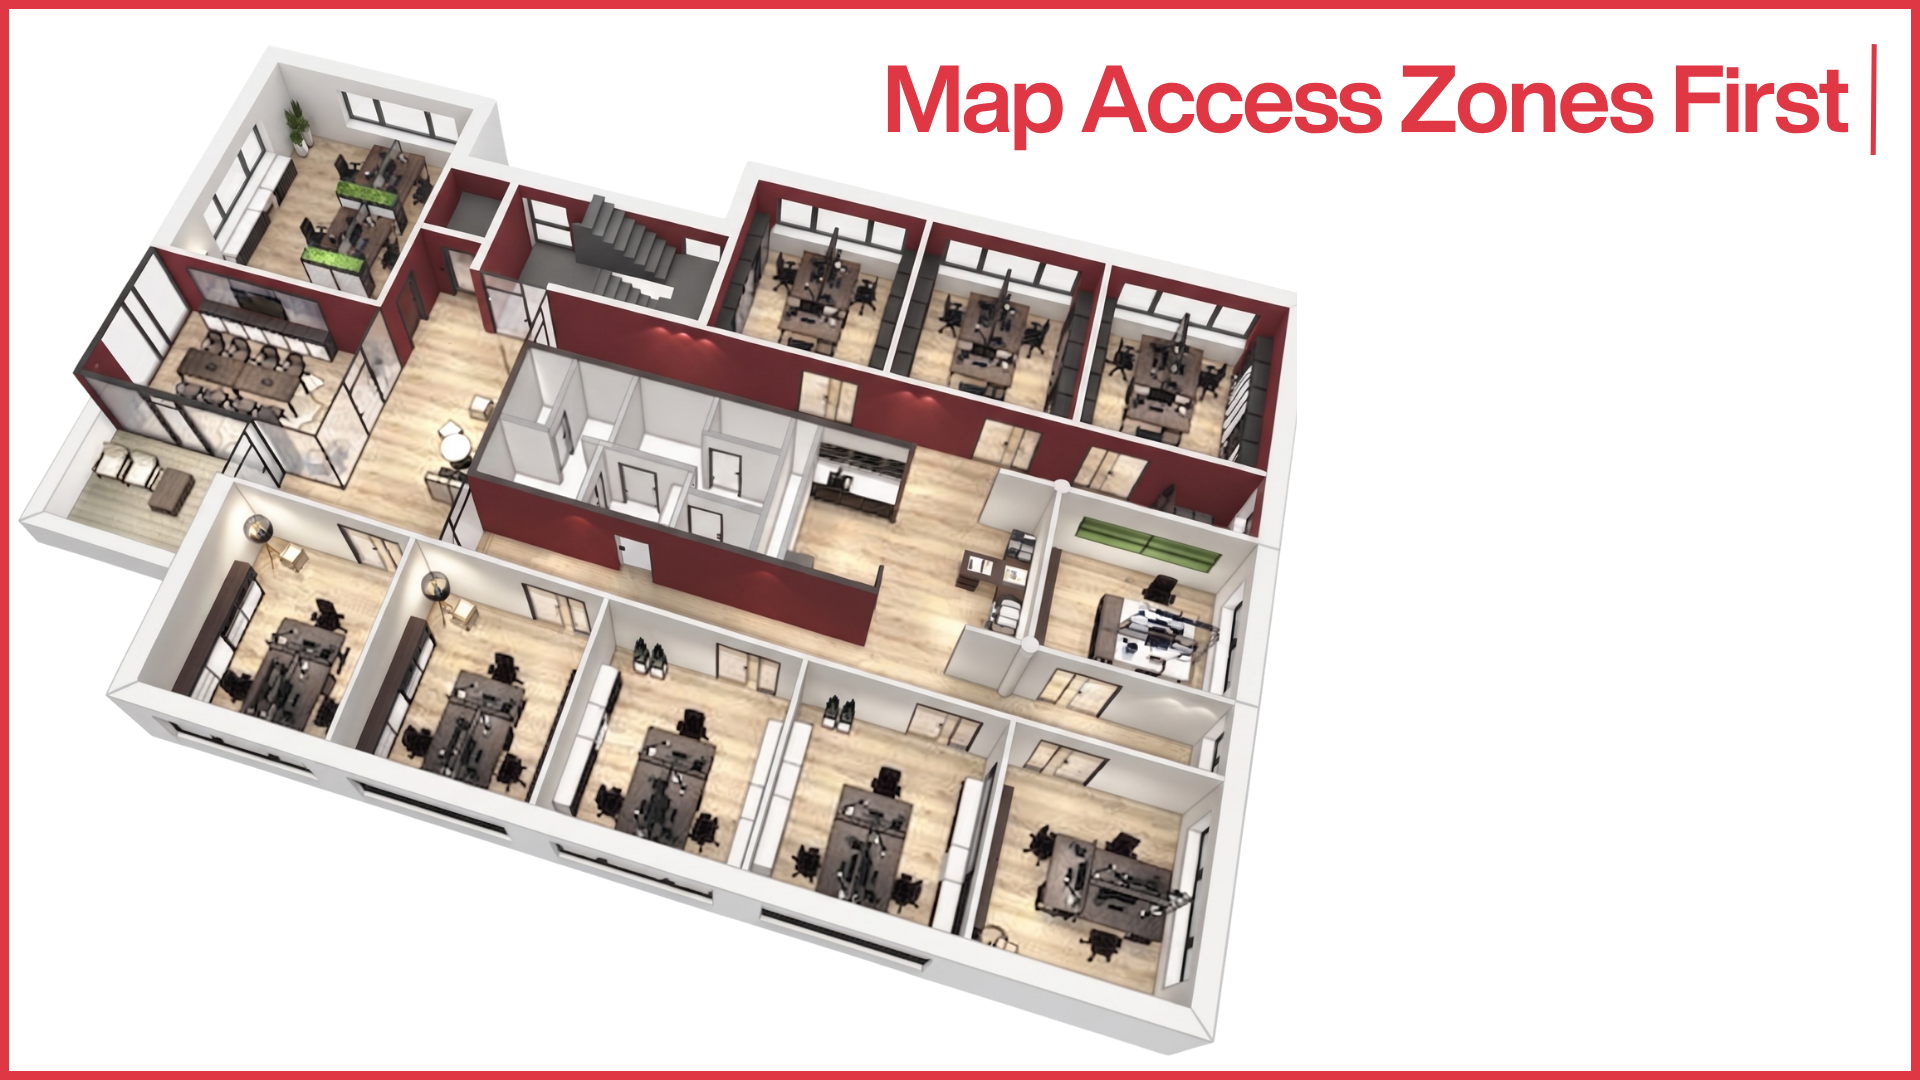
This is a planning step, not a technical one, and skipping it is the leading cause of rollouts that stall, blow their budget, or get quietly abandoned. Do this on paper (or a shared doc) before you talk to a single hardware vendor.
You are answering four questions:
- Which entry points genuinely need automated access? The main gate, the lift lobby, specific floors, the server room? Not every door needs a reader.
- Which visitor types need which zones? A delivery rider, an interview candidate, a client, and an HVAC contractor have very different legitimate footprints.
- Do different tenants or departments need separate rule sets that must not bleed into each other?
- What is the maximum dwell time for each visitor category before access should auto-expire?
The output is a zone map, and it becomes the blueprint for every configuration decision that follows. Here is a worked example you can adapt.
Zone | Who can access | Access duration | Approval needed |
Main entrance | All approved visitors | Full visit duration | Host approval |
Reception to meeting rooms | Business visitors | Meeting slot only | Host approval |
Employee floors | Employees, pre-approved contractors | Shift or visit window | HR or host approval |
Server room | IT staff, approved vendors | Task-specific window | IT admin approval |
Basement or parking | Vehicle-carrying visitors | Full visit duration | Auto-approved |
A quiet benefit of doing this first: it forces a conversation between facilities, IT, HR, and security that usually does not happen until something goes wrong. The zone map is where those four teams agree on what “controlled” actually means for your building.
Step 2: Choose Hardware That Matches Footfall and Risk
Hardware choice depends on three things: what infrastructure you already have, how many people pass through, and how sensitive each zone is. Most Indian offices choose from a small, proven set.
Hardware | Best for | Notes |
Flap barrier or turnstile | High-footfall corporate lobbies | Fast throughput; visible deterrent against tailgating |
Boom barrier | Vehicle entry and exit, parking | Often paired with RFID vehicle tags |
Electronic door lock | Meeting rooms, server rooms | Low cost, easy retrofit |
Biometric reader (fingerprint or face) | High-security zones only | Higher accuracy, slower throughput, added consent burden |
RFID card reader | General office access | Familiar and widely deployed |
QR code scanner | Visitor and contactless access | No physical card; ideal for one-time visitors |
For a VMS-led deployment, QR-based access is almost always the fastest to roll out, because it requires no card stock, no enrolment appointment, and no biometric database. The digital pass the VMS already generates is the credential.
There is also a compliance dimension here that is easy to miss: every biometric reader you add is a new store of sensitive personal data that triggers explicit-consent obligations under the DPDP framework. A QR credential that lives and dies in software sidesteps that entirely, which is one reason asset-light platforms have become the default for offices that want security without a data-protection headache.
Step 3: Confirm the Integration Method Your Panel Supports (This Is the Technical Heart)
This is where projects succeed or fail on a detail nobody checked. Access control panels support one or more integration methods, and your VMS provider needs to match at least one of them for the specific panel model you own, not just the brand. A vendor who says “yes, we work with that brand” has not answered the question.
Method | How it works | Strengths | Watch-outs |
API or webhook | The VMS pushes approved credentials to the panel over an API | Real-time, most flexible | Needs technical setup on both sides |
SDK-based | The hardware vendor’s SDK is embedded in the VMS backend | Deep control over hardware features | Vendor lock-in risk |
Wiegand or OSDP protocol bridge | The panel reads credentials via a standard hardware protocol | Works with older and legacy panels | Real-time flexibility depends on the protocol |
Middleware/connector | A third-party layer translates between the two systems | Good for mixed-vendor estates | Added cost and an extra point of failure |
If you are working with hardware-level protocols, there is a specific technical decision hiding inside that “Wiegand or OSDP” row that has real security consequences, and it deserves its own explanation.
Step 4: Decide How Approval Becomes a Credential a Door Can Read
Once the integration method is confirmed, you decide how a visitor’s or employee’s approved status becomes something a reader can actually verify. Each credential type has its own provisioning flow.
Credential type | Provisioning flow |
QR code | VMS generates a unique, time-bound QR on approval, sends it via WhatsApp, email, or SMS, and the visitor scans it at the reader |
RFID card | VMS pushes the visitor ID to the panel; a temporary card is issued at the desk and mapped to the visitor record |
Face recognition | Visitor photo is captured at check-in, synced to the panel’s facial database, and auto-expires after the visit |
Mobile credential (BLE / NFC) | VMS issues a digital pass to the visitor’s phone, which acts as the credential at compatible readers |
The non-negotiable rule, whichever you choose: every credential must be time-bound and auto-expiring. A visitor pass that never deactivates is not a convenience; it is a security gap sitting in someone’s inbox or wallet. This is the single most important configuration in the entire project, and it is the one that separates an integration that improves security from one that just adds friction.
Step 5: Configure Rule-Based Access Logic
This is where the zone map from Step 1 becomes functional. Rules define exactly what each credential is allowed to do, and they should always be configured centrally, in the VMS or the connected access platform, rather than manually on individual door controllers. Configuring rules door-by-door is how you end up with inconsistent policies that nobody can audit.
Here is a sample rule set for a single visitor type.
Rule parameter | Example setting |
Visitor type | Vendor |
Approved zones | Ground floor, Floor 3 (IT) |
Access window | 10:00 AM to 1:00 PM, single day |
Re-entry allowed | No |
Escalation on denied attempt | Alert to security desk |
Auto-revoke trigger | Visit marked “checked out” in the VMS |
Build one of these for each visitor category in your zone map, and you have translated a planning document into an enforceable policy.
Step 6: Test in a Controlled Environment, Including the Edge Cases

Never go live directly. Run a structured test phase that covers not just the happy path but the failures, because the failures are where security actually lives.
Work through this checklist:
- Valid QR scanned inside the approved window: access granted.
- Valid QR scanned outside the approved window: access denied.
- Expired or already-used QR scanned: access denied and logged.
- Visitor attempts a non-approved zone: access denied and alert triggered.
- Host cancels the visit mid-way: credential deactivated instantly.
- Network or connectivity drop: fallback behaviour (fail-safe versus fail-secure) confirmed at each door.
- Emergency override triggered: doors behave per the fire-safety design.
That sixth item is where the most dangerous mistakes hide, and it deserves a proper explanation, because nearly every guide on this topic explains it too simply.
Fail-Safe vs Fail-Secure: The Safety Decision Most Guides Get Subtly Wrong
The usual framing, “fire exits are fail-safe, server rooms are fail-secure”, is a useful starting point, but it is not the whole truth, and the oversimplification causes real code violations. Here is the accurate version.
The terms describe the behaviour of the secure side of the door (the outside, the card-reader side) when power is lost. They do not describe the egress side.
- Fail-safe: on power loss, the secure side unlocks. Power must be continuously applied to keep it locked. Think “safe for people to get out.”
- Fail-secure: on power loss, the secure side stays locked. Power must be applied to unlock. Think “secure against unauthorised entry.”
Step 7: Train Front-Desk and Security Staff for the First Few Weeks
Even a fully automated system needs human oversight, especially early on, and especially for the moments when the automation is unavailable. Train staff on the exceptions, not the routine.
The training checklist:
- How to manually override access during a technical failure.
- How to identify and handle a denied-access alert.
- How to escalate suspicious or repeated failed attempts.
- How to issue a temporary manual pass if the system is down.
- How to read the VMS dashboard for real-time occupancy and zone status.
A staged training timeline reduces risk without disrupting daily operations.
Phase | Duration | Focus |
Week 1 | Shadow mode | Staff observe the automated system alongside the manual process |
Week 2 | Supervised live | System live, staff supervised by IT or vendor support |
Week 3 onward | Full live | System fully operational, manual process retired |
Step 8: Go Live in Phases, Not All at Once
Rolling out zone by zone significantly reduces risk compared with a single “big bang” launch, and it gives your IT and security teams time to tune the rules against real usage before extending the system.
Phase | Scope | Duration |
Phase 1 | Main entrance only | 1 to 2 weeks |
Phase 2 | Reception to meeting rooms | 1 to 2 weeks |
Phase 3 | Employee floors | 2 to 3 weeks |
Phase 4 | High-security zones (server room, etc.) | 1 week, closely monitored |
The order matters: start where footfall is highest, and sensitivity is lowest (the main entrance), so you shake out network latency, scanner performance, and staff workflow on the least risky door. Save the high-security zones for last, when the system and the team are both proven.
The Failure Modes Nobody Warns You About
Even well-planned projects hit the same handful of predictable friction points. Knowing them in advance is the difference between a two-day fix and a two-week one.
Challenge | Root cause | Fix |
Panel does not support real-time API | Legacy hardware | Use a middleware connector or plan a hardware refresh |
Duplicate or conflicting access rules | Rules configured on both the VMS and the panel independently | Centralise all rule management in one system |
Slow QR scan-to-unlock time | Network latency or scanner limitation | Test scanner hardware before bulk purchase |
Visitors bypassing controlled doors | Tailgating; a physical design gap, not a software issue | Add turnstiles or staff supervision at high-risk points |
Access not revoked after a visit ends | Reliance on manual checkout | Automate revocation on checkout or time expiry |
Confusion during system downtime | No documented fallback | Create and train staff on a manual fallback SOP |
The recurring theme: most “software problems” in access control are actually planning or physical-design problems wearing a software costume. Tailgating is a turnstile problem. Conflicting rules are a governance problem. Un-revoked access is a configuration decision you did not make in Step 4.
How to Pressure-Test a VMS Partner Before You Commit
Not every VMS integrates equally well with physical hardware, and general marketing claims tell you very little. Ask direct, specific questions and listen for specific answers.
- Which access control panel brands and models have you integrated with before? (Models, not just brands.)
- Do you support API or webhook integration, or only hardware-specific SDKs?
- Is credential expiry handled automatically, or does it depend on a manual checkout?
- What happens to access rules if the internet connection drops?
- Can rules be configured differently for different tenants or departments on the same premises?
- Is there a single dashboard showing real-time door-level events, not just check-in records?
- Do your readers and panels support OSDP with Secure Channel, or are they Wiegand only?
A well-integrated system has a recognisable shape, regardless of vendor.
Sign of a well-integrated system | Why it matters |
One dashboard shows check-in and door-entry events together | No reconciling two separate systems |
Access auto-expires without manual intervention | Removes the forgotten-pass risk |
Zone-based rules configurable per visitor type | Matches how your organisation actually works |
Real-time sync between VMS and panel | Prevents entry by an already-checked-out visitor |
Clear, exportable audit trail | Speeds up audits and incident investigations |
This is the category Qudify was built for. As a QR-based, cloud-first VMS, it treats the credential as software: a pass can be generated, validated, and expired entirely through the platform, without issuing a physical card to every visitor or standing up a biometric database. For offices that want the security and audit benefits of integration without the hardware weight, or the added DPDP burden that biometrics bring, that asset-light model does a lot of the heavy lifting.
Conclusion: Frictionless at the Door, Airtight Behind It
Done properly, access control integration turns a VMS from a digital logbook into an active security layer that decides, in real time, who walks through which door, for how long, and under what conditions. The value is not in buying the most expensive hardware. It is in five decisions made in the right order: mapping your zones before you buy anything, choosing a protocol that actually encrypts your credentials, making every credential auto-expire, getting the fail-safe versus fail-secure decision right on every door on a path of egress, and building DPDP-aligned consent and retention in from the start rather than bolting it on later.
When those decisions are right, the integration becomes almost invisible. Visitors scan a QR code and walk in. Employees go about their day. And your security team quietly gains the accurate, timestamped, zone-level audit trail they were never going to get from a paper register or a disconnected front desk. That balance, effortless at the door and uncompromising behind it, is what a successful access control integration actually looks like.
Want to see what QR-based, cloud-first visitor management looks like in practice? Book a 15-minute Qudify demo and see how a software-only credential handles check-in, verification, and auto-expiry without a single card or kiosk.
Frequently Asked Questions
What is the difference between a standalone VMS and an integrated VMS?
A standalone VMS records who checks in at reception, functioning like a digital logbook. An integrated VMS connects to physical barriers such as doors, turnstiles, and boom barriers to automatically grant or deny entry based on predefined rules, tracking a person’s actual movement through the building rather than just their arrival.
What is the most common reason an access control integration fails?
Skipping the planning stage. Teams that buy hardware before mapping their access zones, defining visitor types, and setting duration rules almost always end up with a disorganised rollout, conflicting policies, or an over-specified system that costs far more than the building’s risk justifies.
Should I choose OSDP or Wiegand for my access control readers?
For any new installation, choose OSDP. It uses AES-128 encryption to protect credentials on the wire, supports two-way communication and tamper detection, and was standardised internationally by the Security Industry Association in 2020. Wiegand is older, cheaper, and universally supported, but it transmits credentials in clear text with no tamper awareness. For a Wiegand-wired building, a middleware bridge lets you integrate now and upgrade the protocol during a later refresh.
Why are QR codes recommended for visitor access?
QR codes are the fastest credential to deploy: they are contactless, need no physical card issuance, and require no biometric enrolment. The VMS generates a unique, time-bound QR code and sends it straight to the visitor’s phone. They also avoid collecting biometric data, which sidesteps the explicit-consent obligations that fingerprint and facial systems trigger under India’s DPDP framework.
How should doors behave if the access control system loses power?
It depends on the door’s role, and the decision governs the secure (outside) side; the inside almost always allows free exit regardless. A standard office entrance is usually fail-secure, staying locked during an outage while occupants still exit through the mechanical lever. Electromagnetic locks are inherently fail-safe and need a request-to-exit sensor and a push-to-exit button. Critically, an electric strike on a fire-rated door must be fail-secure, because the fire door has to stay positively latched. Review every door on an egress path with a fire-safety consultant against your local fire code.
How does an integrated system stop visitors from overstaying?
Through rule-based auto-revocation. When a visit is marked “checked out” in the VMS, or the approved time window expires, the system automatically deactivates the credential so it can no longer open any door. This is why auto-expiry is treated as the core control, not a convenience feature.
What does the DPDP Act require when we set up access control in India?
Your organisation is the Data Fiduciary, legally responsible for the movement data the system generates, even if you use a cloud vendor. You must capture explicit consent before collecting any biometric data, store only what an access decision needs (data minimisation), set and document a retention period for access logs, restrict dashboard visibility to authorised staff, and have a data-handling agreement with your vendor. The DPDP Rules 2025 were notified on 14 November 2025 with a phased compliance timeline, so building these practices in from day one is far easier than retrofitting them.
Can access control integration help during a fire or emergency evacuation?
Yes, and it is one of the strongest arguments for it. Because every person in the building holds a recognised, logged credential, the system can produce an accurate, real-time headcount by zone, a reliable muster list, which a front-desk register cannot. Paired with correctly configured fail-safe egress on the right doors, this supports a faster, safer evacuation.